
Wavebid supports the ability to quickly upload photos of lots in bulk. This articles describes the various methods available for uploading photos: Barcode, Filename, and Manual. Photos can also be taken and uploaded via the Wavebid Item Capture App.
Please note, Wavebid defaults to a photo upload size of 1024 x 1024. To increase this upload size, submit a request to support@wavebid.com.
This article contains the following sections:
Barcode System Upload Option
The Barcode System is one of Wavebid's highlighted features. Printing barcodes for catalog photography is a way to label and automatically sort lot photos when they are uploaded, meaning that photos do not need to be manually named or sorted. This system can be used completely offline, regardless of location. Photos can then be uploaded in bulk to Wavebid once internet connectivity is re-established.
The barcodes generated for a specific number will always be the same, regardless of the auction. For example:
The barcode for 10 will always look like this:
While the barcode for 1005 will always look like this:
This allows users to generate and print barcodes once and use them again and again when taking catalog photos for different auctions (as long as each auction is using the same series of lot numbers, ex. 1-300).
Photos do not have to be taken for all of the barcodes generated. If most of a user's auctions are less than 300 lots, that user could generate and print barcodes for 300 lots, but only use the ones they need for each auction.
Please note, the barcode system cannot be used when taking photos and uploading them directly within the Wavebid Item Capture App.
Generating Barcodes
Users will only be able to generate barcodes for an auction if they are listed as the coordinator or they are a user with company admin authority. For more information on roles and permissions, see User Accounts and Permissions.
- From the Dashboard, select My Links > Barcodes.
- Select the Label Type from the drop-down menu. Any Label Type will work, but the preferred type is the Avery 5160 as it has a particularly high read rate.
- If desired, enter the Company Name, select an Auction from the drop-down menu, and enter the auction or company URL. These fields are not required. As selections are made, a preview of the barcode will be visible on the right side of the screen.
- Choose to generate barcodes for a series of lots or for individual lots.
- Enter a Starting Lot number and an Ending Lot number to generate a series of barcodes. For example, entering a Starting Lot of 1 and an Ending Lot of 16 will generate sixteen separate barcodes labeled 1 through 16.
- Enter Individual Lot Numbers to just generate barcodes for those individual lots. Multiple Lot Numbers can be entered into this field as long as they are separated by a space or a comma. Lot numbers cannot be separated by a semicolon. For example, entering 10,20 will generate two barcodes, one labeled 10 and another labeled 20.
- Enter a Starting Lot number and an Ending Lot number to generate a series of barcodes. For example, entering a Starting Lot of 1 and an Ending Lot of 16 will generate sixteen separate barcodes labeled 1 through 16.
-
Padding information can be entered to set all lot numbers to the same character length. This field is optional.
-
The Lot # Padding Size field determines the character length of each lot number. For example, entering a 4 will result in all lot numbers being four digits long.
- Barcode numbers longer than 5 digits will not be recognized by Wavebid.
- The Padding Character is the character that will be used to pad each lot number to reach the value entered into the Lot # Padding Size field. For example, entering 0 will start each lot number with enough zeros to make the lot number 4 digits long. Meaning that a lot number of 10 becomes 0010, and a lot number of 110 becomes 0110. The Padding Character can be one letter or one number.
-
The Lot # Padding Size field determines the character length of each lot number. For example, entering a 4 will result in all lot numbers being four digits long.
- Click the blue Generate PDF button in the bottom right corner of the page.
- A pop-up window with a message regarding printer settings will appear, click the OK button to continue.
- A PDF will open. Verify that the PDF contains all the requested lot numbers.
- Depending on computer settings, the PDF may need to be saved before it can be viewed.
- Click on the Printer icon at the top of the PDF window, or select File > Print.
-
IMPORTANT NOTE: Ensure that the Page Sizing or Size Option is set to Actual Size.
-
IMPORTANT NOTE: Ensure that the Page Sizing or Size Option is set to Actual Size.
- Press the Print button.
- The steps above can be taken again to generate additional barcodes for more lots. Barcodes that have already been generated and printed do not need to be generated again. For example, if barcodes have been already been generated for lots 1 through 16, but are now needed for lots 17 through 20, enter 17 into the Starting Lot field and 20 into the Ending Lot field to generate individual barcodes for lots 17, 18, 19 and 20.
Taking Photos
To use the Barcode System, first take a photo of the barcode itself, followed by the photos of the corresponding lot. Any device (preferably with a macro lens, if enabled) can be used to take the photos: digital camera, phone, tablet, etc. Multiple photos can be taken of each lot. Wavebid will recognize the barcode and put every photo following it into the corresponding lot. Wavebid will then begin a new lot every time it reads a new barcode.
Tips for Photographing Barcodes:
- Barcode photos must be clear and readable.
- Wavebid may not read barcodes correctly if they are dirty, torn, bent, or curved.
- The photo should be a fairly tight shot of the barcode and should be in focus.
- If the photo is taken from too far away, Wavebid is less likely to read the barcode.
- The left edge of the photo should be in the blank white space before the barcode. Wavebid reads at the first dark colored line and will stop at any extended white space.
Barcodes do not have to be taken in numerical order. They can be taken in any order, as long as the photo of the barcode is followed by photos of the correct corresponding lot. For example, if photos are taken of lots 1 though 10 and lot 11 is not yet ready to be photographed, photos can be taken of lots 12 through 16, followed by lot 11 when it is ready.
Once all of the barcodes and corresponding lots are photographed, transfer the photos from the device to a computer.
Uploading Photos
- Navigate to the appropriate auction on the Dashboard and select Photos > Upload Photos.
- Click the Barcode button in the top-right corner of the page.
- Click the Add Files button.
- Select photos to be uploaded from the computer.
- Wavebid defaults to a photo upload size of 1024 x 1024. To increase this upload size, submit a request to support@wavebid.com.
- Photos will appear in the Select Files window. If needed, click the + (#) files queued button to add more photos.
- Click the Start Upload button.
- Photos will be automatically uploaded to their lots based on the photographed barcodes. If the lot doesn't already exist, it will be created at this time. For information on moving photos within lots, or from one lot to another, see Photo Management.
Barcode Indicator
Images that are marked as being 'barcodes' will not be exported to an Online Bidding Platform, will not appear in export ZIP files, and cannot be downloaded via the Photo Management page.
The only way to export or download 'barcode' images to remove the barcode indicator.
- Navigate to the applicable auction from the Dashboard, then select Photos > Manage Photos.
- Select All from the Select Batch drop-down at the top of the page.
- Scroll down to the applicable lot and locate the barcode image.
- Wavebid considers any image a 'barcode image' if it displays a barcode in the lower right corner of the image.
- Wavebid considers any image a 'barcode image' if it displays a barcode in the lower right corner of the image.
- Hover over the barcode image- a series of icons will appear. Click on the Barcode icon.
- The barcode will be removed from the lower right corner of the image. Wavebid will no longer consider this a 'barcode image', so it can now be exported or downloaded the same as any other image.
- The image will also be moved so that it now appears as the last image in the lot. To move it, click on the image and drag it back into the correct order.
- To have the image marked as being a 'barcode image' again, hover over the image again and click on the Barcode icon again.
- The barcode will be removed from the lower right corner of the image. Wavebid will no longer consider this a 'barcode image', so it can now be exported or downloaded the same as any other image.
Barcode System Video Tutorial
Filename Upload Option
Naming Photos
If preferred, photos can be individually named and then automatically uploaded to their corresponding lots. For this to work, photos must be named using a specific naming convention: lot number-photo number. None of the photos should be named using just the lot number.
Third-party image processes, such as IrfanView, can be used to rename images in bulk so that they can be uploaded to Wavebid.
Naming examples:
- Three photos of lot 1 should be named:
1-1.jpg,1-2.jpg,1-3.jpg - Three photos of lot 2 should be named:
2-1.jpg,2-2.jpg,2-3.jpg - Three photos of lot 3a should be named:
3a-1.jpg,3a-2.jpg,3a-3.jpg
Uploading Photos
- Take photos and save them to a computer using the naming convention above.
- Navigate to the appropriate auction on the Dashboard and select Photos > Upload Photos.
- Click the Filename button in the top-right corner of the page.
- Click the Add Files button.
- Select photos to be uploaded from the computer.
- Wavebid defaults to a photo upload size of 1024 x 1024. To increase this upload size, submit a request to support@wavebid.com.
- Photos will appear in the Select Files window. If needed, click the + (#) files queued button to add more photos.
- Click the Start Upload button.
- Photos will be automatically uploaded to their corresponding lots. For information on moving photos within lots, or from one lot to another, see Photo Management.
Manual Upload Option
There are two options available when using this method:
- Single photo per lot is enabled: When this option is selected, Wavebid will automatically create one lot for each photo that appears in the upload queue, regardless of any other conditions selected. This is useful when each lot only has one photo, and the lot number itself is not important (lots can always be renumbered).
- Single photo per lot is disabled: Using this method, Wavebid will create a single Gallery Lot with all of the photos stored within it. The photos can then be manually moved to their respective lots.
Uploading Photos
- Navigate to the appropriate auction on the Dashboard and select Photos > Upload Photos.
- Click the Manual button in the top-right corner of the page.
- To upload each of the photos to a separate lot, check the Single photo per lot box. To upload all of the photos to a Gallery lot to be managed later, uncheck the Single photo per lot box.
- Click the Add Files button.
- Select photos to be uploaded from the computer.
- Wavebid defaults to a photo upload size of 1024 x 1024. To increase this upload size, submit a request to support@wavebid.com.
- Photos will appear in the Select Files window. If needed, click the + (#) files queued button to add more photos.
- Click the Start Upload button.
- If the Single photo per lot box was checked, each photo will be uploaded to its own lot. If the Single photo per lot box was unchecked, all of the photos will be placed in a Gallery Lot.
- Checked:
- Unchecked:
- Checked:
For information on moving photos within lots, or from one lot to another, see Photo Management. For information on editing or re-sequencing lots, see Edit Lot Sequencing.
Manual Upload Video Tutorial
Troubleshooting
Uploaded Photos Changed Size
Wavebid defaults to a photo upload size of 1024 x 1024. To increase this upload size, submit a request to support@wavebid.com.
Invalid Argument to Native Write Image 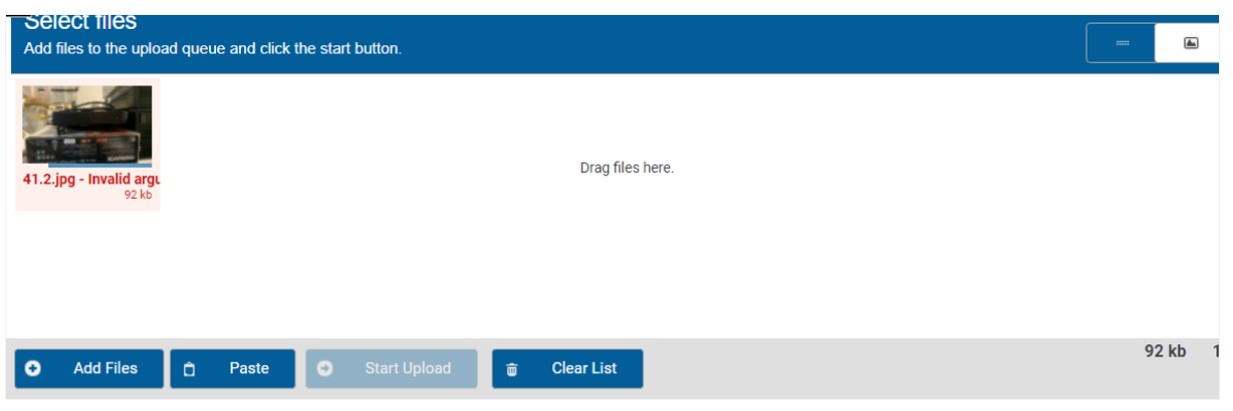
While the name of the image may show it as being a .jpg or .jpeg file type, it likely isn't. Convert the file to a .jpg or .jpeg file type using a file conversion tool, such as IrfanView, and attempt to upload again.
Unsupported Image
The images likely contain EXIF data. Exchangeable Image File Format (EXIF) is a standard that defines specific information related to an image or other media captured by a digital camera. Wavebid cannot read images containing EXIF data.
Third-party image processes, such as IrfanView, can be used to strip images of EXIF data so that they can be uploaded to Wavebid.
Images Not Correctly Uploading to Alpha Lots
If images are being uploaded using the Filename option, the images should be named using the formatting described above. If images are not named following this format, alpha lot images could end up in non-alpha lots. For example, the first image for lot 5B should be named "5B-1" and then second image for lot 5B should be named "5B-2". If the first image for lot 5B was just titled "5B" it may end up in lot 5 rather than lot 5B.
Related Articles:
0 Comments